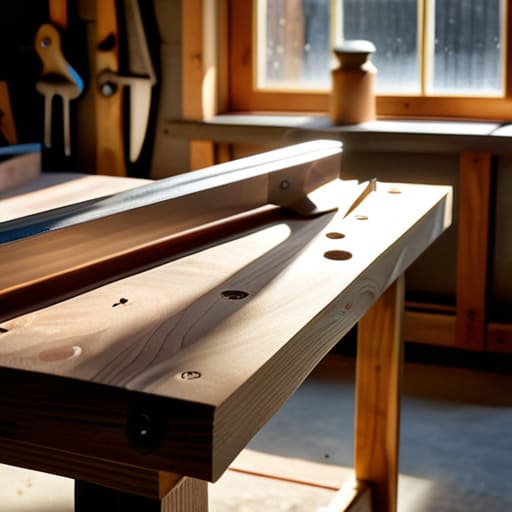
I was standing in my tiny, chaotic apartment in New York, staring at a pile of scattered tools and a half-finished DIY project, feeling like my entire life was just as disorganized as my workspace. I used to think that learning how to build a workbench required a massive workshop and a degree in structural engineering, but I was totally wrong. In reality, it’s not about having the most expensive power tools or a sprawling garage; it’s about creating a dedicated sanctuary where you can actually focus and breathe. Just like my transition from corporate finance to coaching, I realized that building a solid foundation is less about the complexity of the tools and more about the intentionality behind the structure.
In this guide, I’m stripping away the fluff and the intimidating jargon to show you the most efficient, stress-free way to get the job done. I’ll walk you through everything from selecting the right materials to the final assembly, ensuring you create a sturdy station that supports both your hobbies and your mental clarity. You aren’t just building a piece of furniture here; you are building a launchpad for your passions.
Table of Contents
- Step-by-Step Instructions
- Choosing Heavy Duty Workbench Materials for Long Term Stability
- Mastering Sturdy Workbench Design to Support Your Creative Flow
- Five Pro-Tips to Keep Your Workspace Productive and Your Mind at Peace
- Finding Your Center: Why Your Workbench is More Than Just Tools
- More Than Just Wood and Screws
- Building Your Foundation for Success
- Frequently Asked Questions
Guide Overview
Tools & Supplies
- Circular saw or Miter saw for cutting wood to length
- Power drill for driving screws
- Tape measure for precise layout
- Speed square to ensure corners are 90 degrees
- Level to ensure a flat working surface
- 4×4 lumber (legs) 2 pieces
- 2×4 lumber (frame and bracing) 6 pieces
- 4×8 plywood sheet (worktop) 1 sheet
- 2.5-inch wood screws 1 box
- Wood glue 1 bottle
Step-by-Step Instructions
- 1. First things first, we need to sit down and sketch out a plan. I know, I know—it feels a bit unglamorous compared to a yoga flow, but having a blueprint is what keeps your project from becoming a stressful mess. Grab a notebook and decide on the dimensions that actually fit your workspace, and don’t forget to account for the height; you want to be able to work without feeling like you’re hunching over and sacrificing your posture and peace.
- 2. Once you have your vision, it’s time to head to the hardware store for your materials. You’ll want to invest in some sturdy, high-quality lumber—think 4x4s for the legs and thick plywood or solid wood for the top—because a wobbly workbench is the fastest way to lose your momentum. While you’re there, grab a box of heavy-duty screws and some wood glue; think of these as the financial foundation of your build, providing the stability you need for the long haul.
- 3. Now, let’s get to the actual cutting. If you aren’t super comfortable with a power saw just yet, don’t sweat it! You can always have the hardware store make the big, tricky cuts for you. The goal here is precision and intentionality; measure twice and cut once, just like how we carefully audit a budget before making a big investment. Take a deep breath, stay focused, and enjoy the rhythmic sound of the work.
- 4. Next up is the assembly phase, where all those separate pieces finally start to feel like a cohesive unit. Start by attaching your legs to your frame using your screws and glue, making sure everything is perfectly square. I like to think of this stage as building your core values; if the base isn’t solid and aligned, nothing you build on top of it will feel quite right. Take your time to ensure every joint is tight and secure.
- 5. Once the frame is standing tall, it’s time to mount that beautiful workbench top. This is the surface where your creativity will live, so make sure it’s level and firmly attached to the base. If you want to get fancy, you could even add a few clamps or a pegboard for organization, but even a simple, clean top will provide that sense of accomplishment we’re all chasing.
- 6. Finally, give your new creation a little bit of TLC with some sanding. Smooth out those rough edges so you don’t catch a splinter mid-project, and maybe apply a bit of sealant to protect the wood from spills. It’s the perfect moment to step back and breathe, looking at what you’ve created with your own two hands. You haven’t just built a tool; you’ve built a dedicated space for your passion.
Choosing Heavy Duty Workbench Materials for Long Term Stability
When you’re selecting your supplies, I want you to think like a long-term investor. Just like choosing a high-yield savings account over a volatile stock, you want materials that offer stability and peace of mind. If you’re looking for heavy duty workbench materials, I always recommend leaning toward hardwoods like maple or even thick layers of high-grade plywood for the top. While it might feel a bit more expensive upfront, investing in quality now prevents that frustrating “wobble” six months down the line, saving you both money and a massive headache.
I’ve seen so many people rush through the selection process, only to realize their setup can’t handle the pressure of a real project. A sturdy workbench design isn’t just about the thickness of the wood; it’s about the density and how those materials interact. If you’re following specific woodworking workbench plans, pay close attention to the weight requirements. You want something that feels like an anchor in your space—a solid foundation that supports your creative flow without shifting under your hands. After all, your workspace should be a place of calm, not a source of constant adjustment!
Mastering Sturdy Workbench Design to Support Your Creative Flow
When we talk about a sturdy workbench design, we aren’t just talking about making sure it doesn’t wobble when you’re sawing through a piece of oak. It’s about creating a psychological anchor for your creativity. I always tell my clients that just like a solid financial plan or a balanced morning routine, your workspace needs to provide a sense of stability so your mind can truly wander. If you’re constantly adjusting to a shaky surface, you’re losing that precious mental bandwidth needed for your craft. You want a setup that feels like an extension of your own hands, allowing you to enter that “flow state” where time just seems to melt away.
As you move through your custom workshop furniture DIY journey, don’t overlook the importance of ergonomics. It’s not enough to just follow standard woodworking workbench plans; you need to tailor the height and clearance to your specific body. I’ve seen so many people burn out because they spent hours hunched over a bench that was just two inches too low. By prioritizing a design that supports your posture, you’re essentially investing in your own long-term wellness and productivity.
Five Pro-Tips to Keep Your Workspace Productive and Your Mind at Peace
- Prioritize Ergonomics to Protect Your Body: Just like a good yoga flow, your workbench needs to work with your body, not against it. Make sure your work surface height is set so you aren’t hunching over, which prevents that mid-afternoon back ache and keeps your creative energy flowing.
- Organize with Intentionality: I always tell my clients that a cluttered desk leads to a cluttered mind. Incorporate built-in tool storage or pegboards right into your build so that every hammer and screwdriver has a “home,” allowing you to stay in the zone without the stress of a frantic search.
- Invest in Versatile Lighting: You can’t find your professional rhythm if you’re squinting at your work. Plan for integrated LED strips or dedicated task lighting; having bright, clear visibility reduces eye strain and makes your DIY sessions feel much more tranquil and controlled.
- Build in “Buffer Space” for Future Growth: Don’t make your workbench so cramped that you feel claustrophobic. Leave a little extra room on the edges for your coffee, your notebook, or a small plant—having that breathing room is essential for maintaining a sense of calm while you work.
- Think About Mobility from the Start: If you’re working in a smaller space, consider adding heavy-duty locking casters to your design. Being able to roll your workbench to a sunnier spot or tuck it away when you need to reclaim your floor space for mindfulness practice is a total game-changer for work-life balance.
Finding Your Center: Why Your Workbench is More Than Just Tools
Investing in high-quality, heavy-duty materials isn’t just a DIY choice; it’s a way to respect your future self by creating a stable foundation that won’t wobble when life gets heavy.
A well-designed workspace acts as an anchor for your creative flow, allowing you to transition from the chaos of the day into a state of mindful, productive peace.
Remember that building this space is an investment in your personal growth, proving that when you build a solid structure, you create the freedom to pursue your passions without distraction.
More Than Just Wood and Screws
“Building a workbench isn’t just about assembling a piece of furniture; it’s about creating a dedicated sanctuary for your creativity, a stable foundation where your ideas can finally take root and grow without distraction.”
Lena Anderson
Building Your Foundation for Success
At the end of the day, building your own workbench is about so much more than just assembling wood and screws; it’s about creating a dedicated space where your ideas can actually take root. We’ve walked through the essential steps of selecting heavy-duty materials that won’t wobble under pressure and designing a structure that supports your specific creative flow. By focusing on stability and thoughtful design, you aren’t just making a piece of furniture—you are investing in a reliable foundation that will serve your passions for years to come. Remember, the quality of your tools and your workspace directly impacts your ability to focus and find that sweet spot between productivity and pure creative joy.
As you step away from the sawdust and look at your finished creation, I want you to take a deep breath and really soak in that sense of accomplishment. Just like in my career coaching, I know that the most meaningful results often come from the projects we build with our own two hands. This workbench is a physical manifestation of your commitment to your hobbies and your well-being. Use this space to explore, to fail, to learn, and ultimately, to thrive. You’ve built the stage; now, it is time to create something beautiful and enjoy the wonderful balance of a life well-lived.
Frequently Asked Questions
How can I build a sturdy workbench without breaking my budget or needing a professional-grade workshop?
Listen, you don’t need a massive bank account or a high-end studio to create something meaningful. I always tell my clients: start where you are with what you have! Focus on solid, affordable wood like construction-grade pine—it’s sturdy and easy on the wallet. Instead of fancy power tools, master the basics with a simple drill and some reliable clamps. It’s all about building a foundation that supports your passion without draining your savings!
What are some smart ways to organize my new workspace so it stays clutter-free and supports my mental clarity?
Think of your workbench like your bank account: if you don’t track where everything is, things get messy fast! I love using the “Zone Method”—keep your most-used tools within arm’s reach to minimize mental friction. Grab some pegboards to get things off the surface; seeing your tools organized actually lowers cortisol levels. Remember, a clear desk equals a clear mind. When your space breathes, your creativity can finally take center stage!
Is it worth investing in specialized tools right away, or can I get started with just a basic DIY toolkit?
Honestly, don’t feel pressured to drop a fortune on a professional-grade kit on day one! Think of it like building a retirement fund: start small and scale as you grow. Grab a solid basic toolkit first—a reliable hammer, screwdriver set, and measuring tape will get you through most of the heavy lifting. As your passion grows, let your tools evolve with you. Invest in the “big” stuff only when your projects demand it.