There I was, mid-meditation in my tiny Manhattan apartment, trying to find my inner zen, when that dreaded, rhythmic hissing sound pierced through my peace like a broken record. It wasn’t a mindfulness bell; it was my toilet, wasting water and my precious mental energy. Most people think you need to call an expensive plumber the second you hear that sound, but let me tell you, that is a total myth. Learning how to fix a running toilet isn’t some daunting, high-stakes engineering project; it’s actually a small, manageable way to reclaim your home’s harmony (and your hard-earned cash!).
I’ve spent my career helping people navigate complex financial shifts, and I promise you, tackling this little household leak is much simpler than a quarterly budget review. In this guide, I’m going to strip away the jargon and give you the no-nonsense, step-by-step breakdown you actually need to get things flowing correctly again. We’ll dive into the most common culprits—from stubborn flappers to misaligned fill valves—so you can stop the drain on your wallet and restore the tranquility of your sanctuary. Let’s get to work!
Table of Contents
- Step-by-Step Instructions
- Silent Toilet Leak Detection Finding Calm in the Quiet
- A Toilet Tank Components Guide for a Balanced Home
- Five Quick Fixes to Restore Your Home’s Zen (and Your Wallet!)
- Quick Wins for a Peaceful, Cost-Effective Bathroom
- Finding Flow in the Small Fixes
- Finding Your Flow Again
- Frequently Asked Questions
Guide Overview
Tools & Supplies
- Adjustable wrench for tightening bolts
- Screwdriver for adjusting float levels
- Replacement flapper (1)
- Replacement fill valve kit (1)
Step-by-Step Instructions
- 1. First things first, let’s get practical: grab a wrench and shut off the water supply to the toilet. You’ll find a small valve on the wall right behind the unit; just turn it clockwise until it stops. This prevents any unexpected indoor swimming pools while we’re working!
- 2. Once the water is off, flush the toilet and hold the handle down to drain as much water as possible from the tank. We want to work in a relatively dry environment to keep things clean and simple, so let’s give it a minute to settle before we dive in.
- 3. Now, let’s peek inside the tank to find our main culprit—usually, it’s the flapper. This is that little rubber plug at the bottom that lifts when you flush; if it’s old or warped, it won’t create a watertight seal, and that’s exactly why your water is constantly running.
- 4. If the flapper looks worn out, unhook the chain from the handle lever and lift the old flapper off the pegs. When you head to the hardware store, bring the old one with you so you can match the size perfectly—trust me, there’s nothing more frustrating than buying a flapper that’s just a hair too big!
- 5. Before you drop the new flapper in, take a damp cloth and wipe down the rim of the flush valve where the rubber sits. You want that surface to be perfectly smooth so the new seal can do its job without any tiny leaks disrupting your peace of mind.
- 6. Attach your new flapper to the pegs and reconnect the chain to the handle lever. Here’s a little pro-tip from my mindfulness practice: don’t make the chain too tight or too long. If it’s too tight, it will hold the flapper open; if it’s too long, it might get caught underneath, causing the same old problem.
- 7. Finally, turn the water valve back on and watch the tank refill. Once it’s full, wait a moment and listen closely—if you hear silence, you’ve officially mastered this little home repair! Give yourself a pat on the back for taking control of your space and your savings.
Silent Toilet Leak Detection Finding Calm in the Quiet
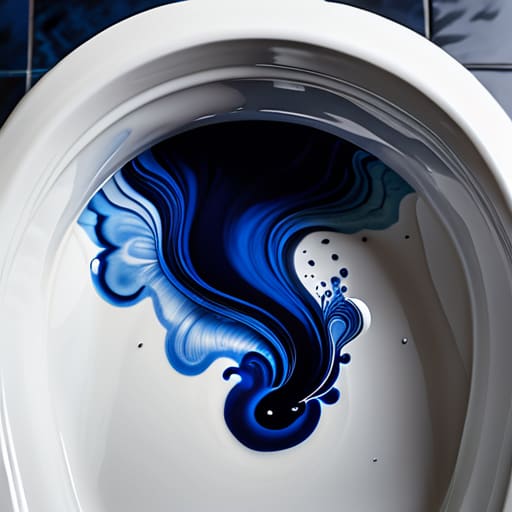
Sometimes, the most stressful problems are the ones you can’t even hear. Just like how a tiny, unaddressed stressor in your career can eventually lead to total burnout, a silent leak in your bathroom can quietly drain your bank account without you ever noticing a sound. To master silent toilet leak detection, I always recommend the “food coloring test.” Simply drop a few drops of dark food coloring into the tank and wait about fifteen minutes without flushing. If you see color creeping into the bowl, you’ve found your culprit. It’s a simple way to gain clarity and prevent unnecessary water waste before it becomes a bigger headache.
If the color stays put, your issue might be more subtle, perhaps requiring a quick toilet fill valve adjustment to ensure the water level isn’t spilling into the overflow tube. Think of this like recalibrating your daily schedule; sometimes we just need to tweak the settings to find our flow again. Taking these small, mindful steps ensures your home—and your finances—stay as balanced and serene as your morning yoga practice.
A Toilet Tank Components Guide for a Balanced Home
Think of your toilet tank like a tiny, high-stakes ecosystem. When one little piece goes out of sync, the whole system feels the stress—much like a cluttered calendar during a busy work week! To master toilet flush mechanism troubleshooting, you first need to get intimate with the players involved. You’ve got your flapper (the gatekeeper), the fill valve (the provider), and the float (the regulator). Understanding how these parts interact is the secret to moving from reactive repairs to proactive maintenance.
When you peek under that lid, keep an eye out for any signs of water leaking from toilet tank edges or around the base. If the water level is constantly climbing too high, you likely don’t need a whole new setup; a simple toilet fill valve adjustment might be all it takes to restore harmony. It’s all about finding that sweet spot where everything flows smoothly without wasting a drop. Mastering this toilet tank components guide isn’t just about plumbing; it’s about reclaiming your home’s peace of mind, one small adjustment at a time.
Five Quick Fixes to Restore Your Home’s Zen (and Your Wallet!)
- Check the flapper first—it’s usually the culprit! If that little rubber seal isn’t seating perfectly, water escapes constantly. Think of it like a door that won’t quite latch; sometimes it just needs a gentle adjustment or a quick replacement to stop the drain on your cash.
- Don’t let the chain get too tight. If the lift chain connecting your handle to the flapper is too short, it keeps the seal propped open. Give it just a little bit of slack so the flapper can drop down and do its job without any drama.
- Watch your water levels like a hawk. If the water in the tank is rising too high and spilling into the overflow tube, your fill valve is likely set too high. A quick turn of the adjustment screw can bring that level back to a peaceful, steady state.
- Give the fill valve a little love. If the water keeps running even after the tank is full, the valve itself might be tired. Cleaning out any tiny bits of debris or replacing the valve is a total game-changer for stopping that endless trickle.
- Listen to the “song” of your plumbing. If you hear a constant hiss or a rhythmic glugging, your toilet is trying to tell you something is off. Catching these small sounds early prevents a massive utility bill from crashing your monthly budget!
Quick Wins for a Peaceful, Cost-Effective Bathroom
Don’t let a tiny leak drain your hard-earned savings; catching a running toilet early is one of the simplest ways to keep your monthly budget in check.
Think of your toilet tank like a well-oiled machine—understanding its individual parts makes troubleshooting feel less like a chore and more like a quick win for your home’s harmony.
True home wellness is about more than just aesthetics; fixing those small, noisy disruptions helps you reclaim your peace of mind and maintain a balanced, stress-free environment.
Finding Flow in the Small Fixes
“Just like in our careers, a little constant ‘noise’ in the background—even if it’s just a running toilet—can drain your energy and your bank account without you even realizing it. Learning to troubleshoot these small leaks isn’t just about plumbing; it’s about reclaiming your peace of mind and ensuring your resources are flowing toward what truly matters.”
Lena Anderson
Finding Your Flow Again
We’ve covered a lot of ground today, from identifying those sneaky silent leaks to understanding exactly how your tank components work together to keep things running smoothly. Whether it was a simple flapper adjustment or a slightly more involved part replacement, remember that tackling these small home repairs is all about taking control of your environment. By fixing that running toilet, you haven’t just stopped a wasteful drip; you’ve successfully optimized your home’s efficiency and saved yourself from unnecessary stress (and those pesky water bills!). It’s those little wins that add up to a much more manageable and peaceful living space.
As I always tell my coaching clients, the way we handle the small, nagging tasks in our lives often mirrors how we approach our bigger professional hurdles. Don’t let a minor mechanical hiccup—or a minor setback in your career—drain your energy and resources. Instead, approach it with patience, a clear plan, and the knowledge that you are entirely capable of fixing it. Take a deep breath, enjoy the quiet of a silent bathroom, and carry that same sense of empowered momentum into everything else you do today. You’ve got this!
Frequently Asked Questions
Is it worth calling a plumber right away, or can I really handle this myself without making a huge mess?
Honestly, take a deep breath—you’ve got this! Most running toilets are just a simple fix, like a worn-out flapper, that won’t cost much more than a trip to the hardware store. If it’s a basic part replacement, save your hard-earned money and DIY it. However, if you see water spraying everywhere or suspect a broken pipe, call the pro. Don’t let a little plumbing stress ruin your zen!
If I replace the flapper, will I also need to buy a whole new fill valve to keep my water bill from skyrocketing?
That is such a smart question! Think of it like a career pivot: sometimes you just need a new skill (the flapper), and sometimes you need a whole new strategy (the fill valve). If your flapper is the only culprit, replacing it should stop the leak and save your budget. However, if the water is still running after a new flapper is installed, your fill valve is likely the “burnout” in your system and needs a replacement too!
How can I tell if the leak is actually coming from the tank or if it's a bigger issue with the wax ring under the toilet?
This is such a great question! It’s like trying to figure out if a budget leak is just a stray subscription or a major financial oversight. Here’s the trick: check the floor. If you see water pooling around the base or notice a funky smell, that’s likely your wax ring calling for help. But if the floor stays bone-dry and the water is only inside the bowl, you can breathe easy—it’s just a tank issue!