How to Use a Drill: a Beginner's Guide
 Lena Anderson
I was standing in my tiny Brooklyn apartment, staring at a half-assembled bookshelf and a power tool that felt more like a weapon than a helpful gadget. My heart was racing, my palms were sweaty, and I was genuinely convinced that if I even breathed on the trigger, I’d somehow ruin my walls or, worse, lose a finger. We’ve been told that DIY is all about rugged toughness and instant gratification, but let’s be real: learning how to use a drill can feel incredibly intimidating when you’re just trying to build a life that feels organized and stable.
I promise you, it’s not about being a "handy person" or having a garage full of expensive gear; it’s about finding your flow and approaching the task with a bit of mindfulness. In this guide, I’m stripping away the technical jargon and the intimidation factor to give you the honest, practical steps you actually need. We’re going to cover everything from selecting the right bit to mastering that steady hand, ensuring you walk away feeling empowered and capable of tackling your next home project with total confidence.
Table of Contents
- Step-by-Step Instructions
- Mastering Drill Bit Types and Uses for Creative Projects
- Navigating Drilling Into Wood vs Metal With Ease
- Drill Like a Pro: 5 Mindful Tips for Precision and Peace of Mind
- Finding Your Rhythm: Lessons Beyond the Toolbox
- Precision, Patience, and Power
- Bringing It All Together
- Frequently Asked Questions
Guide Overview
Tools & Supplies
- Power drill (cordless or corded)
- Drill bits (appropriate size for material)
- Workpiece (wood, metal, or plastic)
- Safety glasses (1 pair)
Step-by-Step Instructions
- 1. First things first, let's talk about your gear. Before you even think about pulling the trigger, you need to pick the right bit for the job. Think of it like choosing the right outfit for a job interview—if you show up in sweatpants to a corporate boardroom, it’s just not going to work. For wood, you'll want a standard twist bit, but if you're tackling metal, you'll need something a bit more hardcore. Take a second to double-check that your bit is seated tightly in the chuck; we want stability and safety above all else.
- 2. Once you’ve got your bit locked and loaded, it’s time to find your center. I know, it sounds a bit "yoga studio," but seriously—get into a sturdy stance. If you're working on something large, like a bookshelf, make sure the material is clamped down tight. You don't want your project sliding away from you just when you're hitting your stride. Achieving this physical balance is the secret to preventing those annoying slips that can ruin a perfectly good piece of wood.
- 3. Now, let's talk about the "sweet spot" of pressure. When you place the tip of the drill against your mark, don't just lean your entire body weight into it. Instead, apply a steady, consistent pressure that feels controlled. It’s a lot like managing a high-pressure project at work: if you push too hard too fast, you’ll burn out (or break the bit), but if you're too timid, you won't get any results. Find that middle ground where you feel in total control.
- 4. Ready to make some noise? Gently squeeze the trigger to start the drill at a slow speed. This is your "warm-up phase." It allows the bit to bite into the material and create a pilot hole without jumping around. Once you feel the drill has found its groove and is running smoothly, you can gradually increase your speed. Think of it as building momentum—start small, find your rhythm, and then scale up.
- 5. As you're drilling deeper, keep an eye on your progress. If you're working with thick wood, you might want to pull the bit out slightly every once in a while to clear out the debris. It’s like clearing your inbox at the end of the day; it keeps things from getting cluttered and messy. This little bit of maintenance ensures the hole stays clean and your drill motor doesn't have to work overtime.
- 6. When you’ve reached your desired depth, don't just yank the drill away! This is where most people make a mistake. Slowly release the trigger to let the drill come to a complete stop, and then gradually lift the bit out of the hole. This prevents the bit from catching on the edge of the material and splintering the surface. It’s all about that graceful exit, leaving your work looking professional and polished.
Mastering Drill Bit Types and Uses for Creative Projects
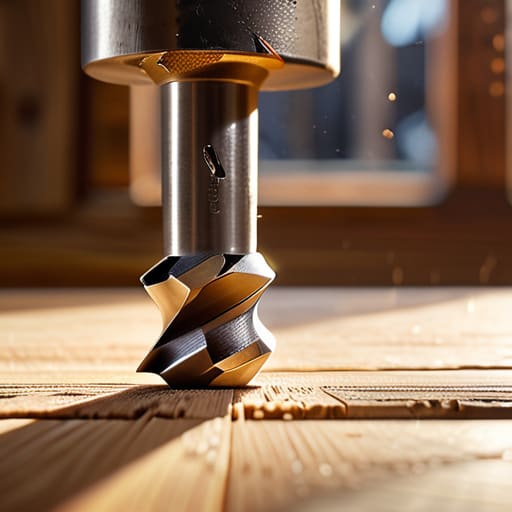
Think of your drill bits like a professional wardrobe; you wouldn't wear hiking boots to a boardroom meeting in Manhattan, right? Choosing the wrong bit can be just as jarring for your project. When you're navigating drilling into wood vs metal, the distinction is everything. For those beautiful reclaimed wood shelves, you’ll want a spade bit or a twist bit to keep things smooth. But if you're working on a metal bracket for a DIY organizer, grab a HSS (High-Speed Steel) bit. Using the wrong one won't just ruin your material; it’ll leave you feeling frustrated, and we are definitely not about that energy today.
Once you’ve picked your tool, don't forget about the finesse. I always tell my clients that success is in the fine-tuning. Take a moment for adjusting drill torque settings to ensure you aren't applying too much force and stripping your screws. It’s all about that intentional, steady flow. If you treat your tools with respect and precision, they’ll reward you with a finished product you can actually be proud of.
Navigating Drilling Into Wood vs Metal With Ease
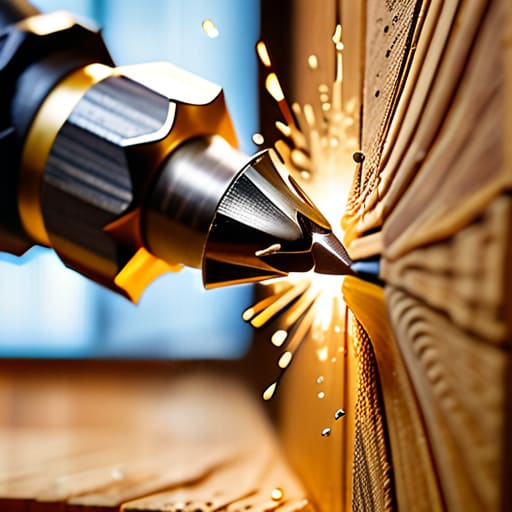
Think of drilling into wood versus metal as the difference between a gentle yoga flow and a high-intensity HIIT workout; they both require focus, but the energy you bring to them is totally different. When you're working with wood, it’s all about speed and a bit of finesse to prevent splintering. You can usually keep your RPMs higher here, but always keep an eye on your pressure to ensure you aren't tearing through the grain. It’s quite rewarding once you see that clean, perfect hole!
Metal, however, requires a much more disciplined approach. You can't just rush in; you need to slow things down and apply steady, firm pressure. This is where adjusting drill torque settings becomes your best friend to prevent the bit from slipping or stripping your work. If you find yourself getting frustrated, just take a deep breath—precision is better than speed every single time. Also, a little pro-tip: using a drop of oil can keep things cool and prevent your bits from wearing down prematurely. Mastering the nuances of drilling into wood vs metal is really just about learning to listen to your tools and respecting the material.
Drill Like a Pro: 5 Mindful Tips for Precision and Peace of Mind
- Mark Your Territory: Before you even touch the trigger, take a second to mark your spot with a pencil. It’s like setting an intention in yoga—if you don't know exactly where you're going, you're bound to lose your balance (and your alignment!).
- Embrace the Slow Burn: You don't need to go full throttle immediately. Start with a gentle, slow squeeze on the trigger to let the bit find its groove. It’s much better to build momentum gradually than to rush in and strip your screw or crack your wood.
- The Power of Stability: Think of your body as the foundation. Plant your feet, keep your shoulders relaxed, and use your non-dominant hand to steady the workpiece. If your base isn't solid, your drill won't be either.
- Listen to the Rhythm: Just like finding your flow in a meditation session, listen to the sound of the motor. A high-pitched screech usually means you're pushing too hard or using the wrong bit. Let the tool do the heavy lifting; you just provide the direction.
- Safety is Your Best Investment: I know, I know—it's not as "fun" as the actual building part, but please, wear your eye protection! Think of it as protecting your most valuable assets. A little bit of caution goes a long way in ensuring you can enjoy your finished project without any unexpected setbacks.
Finding Your Rhythm: Lessons Beyond the Toolbox
Remember that precision comes from patience; just like in a yoga flow, rushing through a task often leads to mistakes, so take a breath and let the tool do the heavy lifting.
Don't be afraid to invest in the right bits for the job, because having the proper tools isn't just about efficiency—it's about giving yourself the confidence to tackle any project without the stress.
View every DIY mishap as a learning opportunity rather than a failure; mastering a new skill is a journey of growth, and every hole you drill is a step toward building a more capable version of yourself.
Precision, Patience, and Power
"Think of a drill not just as a tool for making holes, but as a way to build something lasting; just like in your career, it’s all about finding that perfect balance between applying the right amount of pressure and knowing exactly when to let the momentum do the work for you."
Lena Anderson
Bringing It All Together
We’ve covered a lot of ground today, from picking the perfect bit to navigating the tricky differences between wood and metal. It might feel like a lot of technical jargon right now, but remember that mastering these fundamentals is really just about building your foundation. Whether you are hanging a single piece of art or tackling a full-scale renovation, the secret lies in staying organized, choosing the right tool for the specific material, and—most importantly—keeping your movements steady and controlled. Once you get the hang of the rhythm, you'll realize that using a drill isn't just a chore; it's a way to take control of your environment and turn a vision into something tangible.
As you head off to your next project, I want you to take a deep breath and remember why you started this in the first place. Maybe it's the desire to create something beautiful with your own two hands, or perhaps it's simply the thrill of learning a new skill that makes you feel more capable. Don't let a little bit of dust or a misplaced hole discourage you; every mistake is just a lesson in disguise. I truly believe that true empowerment comes from the willingness to try, to fail, and to keep going until you find your flow. So, grab your drill, trust your instincts, and go create something wonderful!
Frequently Asked Questions
Is it possible to over-tighten a screw and actually damage my project or the drill itself?
Oh, I’ve been there! It’s so tempting to just power through, but yes—over-tightening is a real thing. You can easily strip the screw head or, even worse, crack the wood you're working on. And if you're using a high-torque setting, you might even put unnecessary strain on your drill’s motor. Think of it like a yoga pose: you want tension and stability, but if you push too hard, something’s going to snap! Slow and steady wins.
How do I know when I'm applying too much pressure and risking a slip that could ruin my work?
Honestly, I’ve been there—leaning in way too hard and feeling that sudden, heart-stopping slip! If you’re feeling like you have to wrestle the drill to get it to work, stop right there. You’re overdoing it. Think of it like a mindful yoga pose: you want steady, intentional engagement, not brute force. If your hands are cramping or the drill is jumping, back off. Let the bit do the heavy lifting while you just guide the rhythm.
What are some simple ways to keep my workspace organized so I don't lose track of my bits mid-project?
Honestly, I’ve learned the hard way that a cluttered workspace is just a recipe for mental clutter! To keep those tiny bits from playing hide-and-seek, I swear by magnetic trays—they’re absolute lifesavers for catching screws and bits mid-project. You could also grab a cheap tackle box or a dedicated bit organizer. Think of it like your financial budget: if you don't have a specific place for everything, things just... disappear!