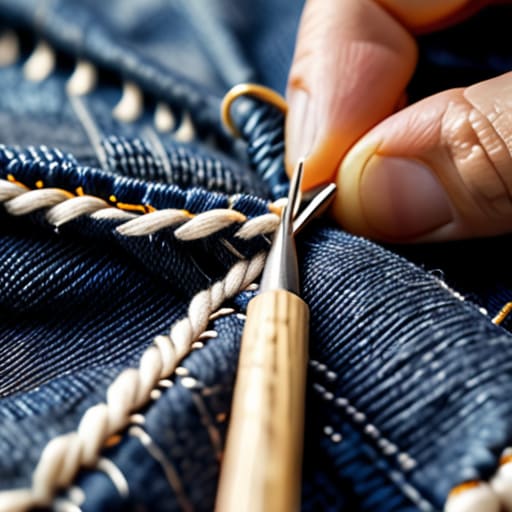
I was sitting on my yoga mat in my tiny Brooklyn apartment, trying to find my center, when I felt that dreaded, unmistakable draft against my thigh. I looked down to see a gaping hole in my favorite vintage Levi’s—the ones that have been with me through every career pivot and New York milestone. Most people would tell you that a tear like that means it’s time to head to the mall and drop eighty bucks on a new pair, but honestly? That is such a waste of both your money and your energy. Learning how to patch jeans isn’t just about fixing a piece of fabric; it’s about practicing a little bit of intentionality and refusing to let a small mishap derail your flow.
In this guide, I’m stripping away all the complicated sewing jargon to give you the real, no-nonsense way to mend your denim. I’ll show you exactly how to patch jeans so they look intentional and stylish rather than just “repaired,” whether you’re going for a subtle fix or a bold, creative statement. We’re going to focus on practical, budget-friendly techniques that respect your time and your wallet. Let’s get those favorite pairs back in your rotation so you can get back to living your best life without a single worry about a wardrobe malfunction.
Table of Contents
- Step-by-Step Instructions
- Finding Creative Joy Using Visible Mending Techniques
- Transforming Denim Fabric Scraps Into Personal Treasures
- Lena’s Pro-Tips for Mending Without the Stress
- My Final Thoughts: Stitching Success into Your Daily Life
- ## The Philosophy of the Stitch
- Mending Your Way Forward
- Frequently Asked Questions
Guide Overview
Tools & Supplies
- Fabric scissors for cutting patch shapes
- Sewing needle for hand stitching or machine sewing
- Thimble to protect finger during heavy denim stitching
- Denim patch fabric or scrap denim
- Heavy-duty thread matching the denim color
- Sewing pins to hold the patch in place
Step-by-Step Instructions
- 1. First things first, let’s gather our supplies so we don’t have to break our flow mid-project. You’ll need a needle (a sturdy one!), some high-quality thread that matches your denim, a pair of sharp scissors, and of course, your patch fabric. I personally love using a scrap of an old flannel shirt or a different shade of denim to give it that intentional, lived-in look.
- 2. Once you have your materials, lay your jeans flat on a clean surface and find that pesky hole. Before you start sewing, you’ll want to trim away any loose, fraying threads that might get caught in your stitches. Think of this as clearing the mental clutter before you dive into a big task—it makes everything much smoother!
- 3. Now, place your patch fabric underneath the hole. If you’re going for a subtle repair, try to match the color as closely as possible, but if you’re feeling bold, go for a contrasting pattern. Secure the patch in place with a few tiny stitches or even some safety pins to ensure it doesn’t slip around while you work.
- 4. It’s time to get sewing! I recommend using a “running stitch” or a “whip stitch” around the edges of the hole to anchor the patch down. Keep your tension even—not too tight that the fabric puckers, but not so loose that the patch feels flimsy. It’s a lot like finding your rhythm in a yoga flow; you want a steady, consistent pace.
- 5. For those larger holes that need a bit more structural integrity, you might want to try a “darning” technique. This involves sewing back and forth across the hole in a grid pattern, essentially weaving new threads into the existing fabric. It takes a little more patience, but the result is incredibly strong and durable.
- 6. Once you’ve secured the edges and filled in the gap, take a moment to inspect your handiwork. Give the area a gentle tug to make sure everything is holding firm. If you see any loose loops, just trim them carefully. You’ve just turned a “ruined” item into a one-of-a-kind treasure.
- 7. Finally, give your jeans a quick celebratory spin! If you want to set the stitches even more firmly, you can iron the area on a medium heat setting (just be careful if your patch is a delicate fabric). Now, you’re ready to head out and wear your history with pride!
Finding Creative Joy Using Visible Mending Techniques
Once you’ve mastered the basics of how to fix holes in denim, I want to invite you to stop seeing those repairs as “fixes” and start seeing them as artistic opportunities. In my yoga practice, we talk a lot about embracing imperfections, and I think the same applies to our wardrobes. Instead of trying to hide a tear with a matching thread, why not lean into the beauty of it? Using visible mending techniques like Sashiko stitching can transform a worn-out spot into a stunning focal point. It’s incredibly meditative—much like a mindfulness session—to sit down with a colorful sewing needle and thread for denim and simply create something beautiful out of something broken.
If you’re feeling a bit stuck, look through your scrap bin for some leftover denim fabric scraps or even some vintage lace. Layering different textures over a patch adds a depth that a standard repair just can’t match. Think of it as personalizing your “career uniform” or your weekend favorites; you aren’t just mending clothes, you’re telling your own unique story through every stitch.
Transforming Denim Fabric Scraps Into Personal Treasures
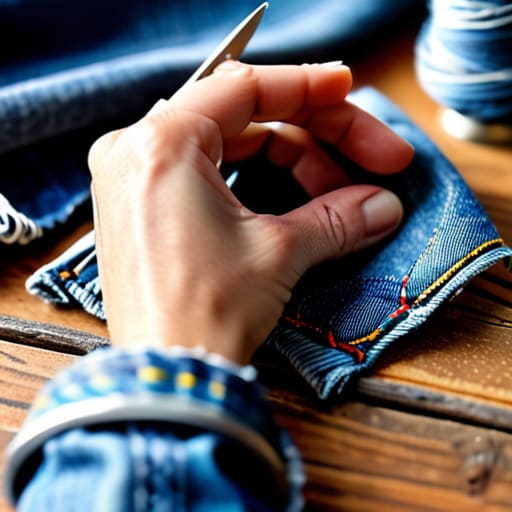
Once you’ve mastered the basics of how to fix holes in denim, don’t just toss those leftover bits into a junk drawer! I like to think of those little remnants as tiny opportunities for creativity. Instead of letting your denim fabric scraps go to waste, try repurposing them into something entirely new. I’ve personally used small offcuts to create custom coasters or even little fabric charms for my yoga bag. It’s a wonderful way to practice mindfulness; as you sit there carefully cutting and shaping, you’re essentially turning waste into wonder.
If you aren’t quite ready to tackle a full-blown sewing project, you can still use these scraps to enhance your existing repairs. For instance, layering different textures of denim can add a beautiful, multidimensional look to your favorite pair of pants. It’s much more soulful than just slapping on some generic iron-on denim patches that lack personality. By integrating these scraps into your mending routine, you aren’t just repairing clothes—you are curating a wearable history of your own journey and creativity.
Lena’s Pro-Tips for Mending Without the Stress
- Pick your fabric with intention. Instead of just grabbing any old scrap, try to find a piece of denim that has a similar weight to your jeans; it makes the patch feel much more seamless and way less bulky.
- Don’t fear the needle! If you’re nervous about making a mistake, start with a light pencil sketch on the underside of the fabric to map out your patch area—it’s like a little roadmap for your creativity.
- Mind your tension. When you’re stitching, try to keep your thread tension consistent; you don’t want your beautiful new patch to pucker up like a wrinkled business suit after a long Monday.
- Embrace the “imperfection” mindset. If a stitch goes a little crooked, don’t sweat it! That’s where the character lives. Think of it as a unique fingerprint on your garment rather than a flaw.
- Secure the edges first. To prevent your patch from fraying and turning into a total headache later, always make sure you’ve reinforced the perimeter of the hole before you start your decorative stitching.
My Final Thoughts: Stitching Success into Your Daily Life
Don’t let a small tear stop your momentum; mending your clothes is a beautiful way to practice mindfulness and slow down in our fast-paced world.
Embrace the “perfectly imperfect” by using visible mending to turn a flaw into a unique feature that tells your personal story.
View repair as a form of sustainable wealth—by caring for what you already own, you’re making a smart financial choice that honors both your wallet and the planet.
## The Philosophy of the Stitch
“Think of patching your jeans as a metaphor for life: we don’t have to hide our scars or the places where we’ve worn thin; instead, we can mend them with intention, turning our old breaks into our most beautiful, colorful strengths.”
Lena Anderson
Mending Your Way Forward
As we wrap up this little journey of thread and needle, I hope you feel more confident about tackling those pesky holes in your favorite denim. We’ve covered everything from the technical basics of a sturdy patch to the beautiful, soulful art of visible mending and turning tiny scraps into something meaningful. Remember, whether you’re aiming for a seamless, invisible fix or embracing a bold, colorful design that tells a story, the goal is the same: to extend the life of what you already love. By choosing to repair rather than replace, you aren’t just saving a few dollars—which, as my finance brain loves to remind you, is a huge win for your budget—you’re also practicing a more intentional way of living.
At the end of the day, mending your jeans is about so much more than just fabric and cotton. It’s a beautiful metaphor for how we handle the “tears” in our own lives; we don’t have to throw everything away just because it’s a little broken. We can take those imperfections, add a bit of creativity, and turn them into something even more beautiful than they were before. So, grab your needle, take a deep breath, and enjoy the process of creating something lasting. You’ve got this!
Frequently Asked Questions
I’m worried about my favorite vintage pair—will patching them make them look too bulky or heavy to wear?
I totally hear you—nobody wants to feel like they’re wearing a denim suit of armor! If you’re worried about bulk, the secret is in the layers. Instead of thick, heavy patches, try using lightweight cotton scraps or even a fine denim voile. Keep your stitching tight and avoid overlapping too many layers in one spot. Think of it like mindful breathing: keep it light, intentional, and seamless so your jeans still flow beautifully.
Is there a specific type of thread I should look for so my repairs don't just unravel after one wash?
That is such a great question! Honestly, there’s nothing more frustrating than spending an hour on a beautiful repair only to have it fall apart in the laundry. For denim, I always recommend grabbing a heavy-duty polyester thread. Unlike cotton, polyester is super strong and handles those machine wash cycles like a pro without fraying. If you’re doing a thicker seam, look for “topstitching thread”—it’s a bit beefier and gives that classic, sturdy denim look!
How do I know if a tear is actually "fixable," or if the denim is too worn out to save?
I call this the “pinch test.” Grab the fabric around the tear and give it a gentle tug. If the denim feels thin, papery, or if you see tiny holes forming near the rip, it’s likely reached its expiration date. Think of it like a career burnout—if the foundation is too frayed, a quick patch won’t hold. If it’s still sturdy but just has a hole, you’re good to go!